

Project Quick Facts
From Exhibition Stand to Meeting Room Feature Wall #
When we finished the exhibition, we couldn’t bring ourselves to dismantle the main display panel completely. It was too well-designed to end up in storage. So we made a practical decision: move it to our office and turn it into a permanent feature of our meeting room.
As it turned out, the panel fit the available wall almost perfectly — one of those rare coincidences that makes a project feel like it was always meant to go that way.
The Design: Vertical Wood Profiles and Hidden LEDs #
The wall draws from a popular interior design trend that uses vertically arranged wooden slats to add texture and warmth to a space. The effect is subtle — the wood breaks up a flat wall without overwhelming it, and the grain and shadow lines give the surface a sense of depth even before the lighting is switched on.
Between the wooden slats, we installed aluminum LED profiles fitted with digital pixel strips. The aluminum profiles sit flush with the wood, so the overall surface reads as a single unified composition rather than a collection of separate components.
The 3 cm Rule: Why Depth Matters #
The most important technical consideration during planning was profile depth. For both the wooden slats and the aluminum LED profiles, we needed a minimum depth of approximately 3 cm.
This is not an arbitrary number. At less than 3 cm, individual LED points remain visible through the diffuser — you see a row of distinct dots rather than a continuous line of light. At 3 cm or more, the light from adjacent LEDs overlaps sufficiently to merge into a single, unbroken beam. The result is a smooth, professional-looking output that holds up at close viewing distances, which matters in a meeting room where people sit directly in front of the wall.
Getting this right during planning saved us from a result that would have looked unfinished. If you are designing a similar installation, treat the 3 cm minimum as non-negotiable.
Four Panels, Four SPI Lamps, One LEC3 #
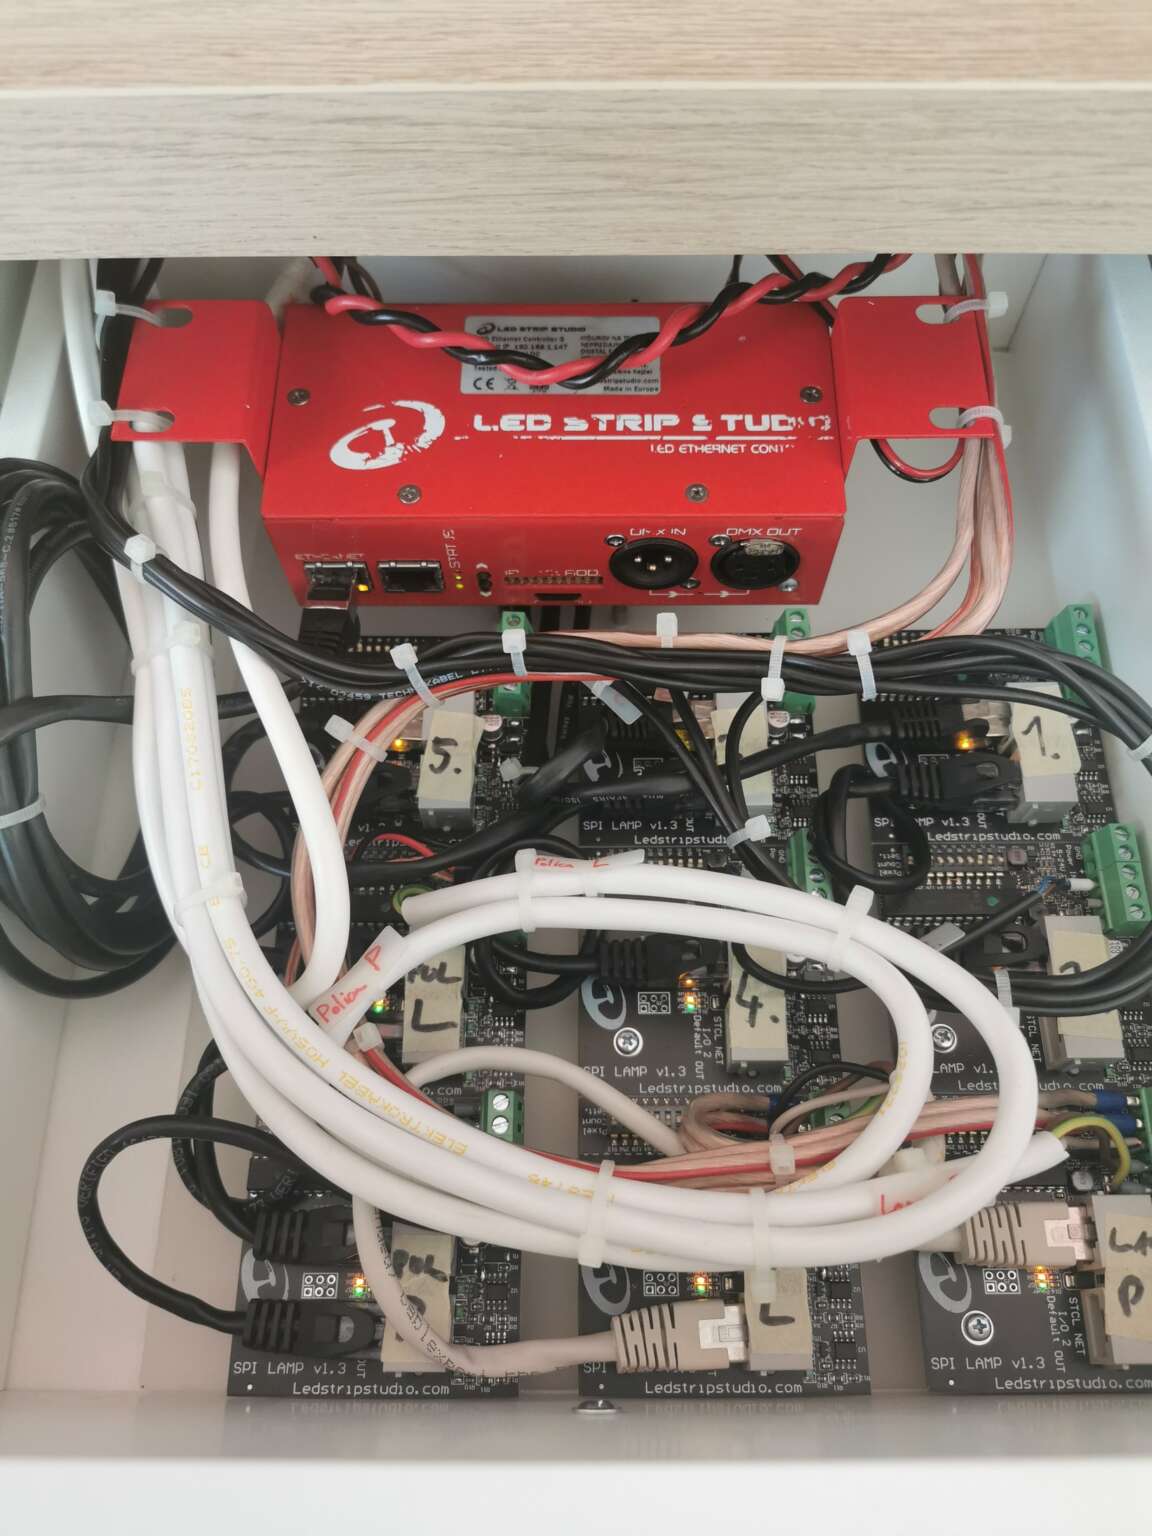
The wall is divided into four independent panels. Each panel is connected to its own SPI Lamp device, which drives the addressable strip segments on that section of the wall.
This was a deliberate architectural choice rather than a compromise. Using separate SPI Lamps per panel means we avoided running signal cables from one panel to the next — a common approach that introduces signal degradation risk and makes the cabling layout more complex. Instead, each panel is self-contained at the signal level.
All four SPI Lamps are coordinated through a single LEC3 controller, which handles the overall timing and animation playback. One device controls the whole wall, four devices deliver the signal to the strips — the setup is clean, scalable, and easy to service if a single panel ever needs attention.
The Finishing Touches: IKEA Lamps and Shelves #
The wall doesn’t stand alone. On either side, we added IKEA lamps and shelves — a deliberate choice that blends the LED installation with everyday furniture rather than framing it as a standalone technical display.
This is also where the advantage of the SPI Lamp approach becomes obvious in practice. Adding lighting to the shelf areas required no complex signal routing — the SPI Lamp on each adjacent panel handles its own segment independently. No daisy-chaining, no long signal cable runs across the room.
The Result #
The meeting room now has a wall that works on two levels: as a functional LED installation capable of running animations and effects, and as a piece of interior design that you would notice even if all the LEDs were off. The wooden slats, the recessed aluminum profiles, the ambient lamps, and the shelves combine into something that feels intentional rather than technical.
It started life as an exhibition stand. It ended up being exactly what our meeting room needed.
FAQ #
Why use separate SPI Lamps for each panel instead of running one signal cable through all four?
Running a single signal cable from panel to panel — daisy-chaining — is a common approach, but it introduces a few practical problems. Each connection between panels is a potential point of signal loss or failure. Cable routing between panels can be awkward depending on the installation geometry. And if one panel develops a fault, isolating it often means disrupting the entire chain. Using a dedicated SPI Lamp per panel eliminates these issues: each panel is independently connected, the signal path is short and direct, and any maintenance work on one section has no effect on the others. The tradeoff is a few extra devices, which is a small cost compared to the reliability and simplicity it buys.
What is the minimum profile depth to avoid seeing individual LED dots through a diffuser?
The commonly used minimum is 3 cm. Below that depth, the distance between the LED strip and the diffuser is not sufficient for the light cones of adjacent LEDs to overlap meaningfully. The eye can still resolve individual bright points. At 3 cm or more, the cones overlap enough that the output reads as a continuous band of light rather than a dotted line. This applies to both aluminum LED profiles and any surrounding material — in this installation, both the wooden slats and the aluminum profiles were designed to meet or exceed 3 cm for consistent results across the whole surface.
What is an SPI Lamp and how does it differ from a standard LED controller?
An SPI Lamp is a compact output device that receives pixel data over a network and drives an addressable (SPI-protocol) LED strip. Unlike a traditional controller where you might plug the LED strip directly into the main control hardware, an SPI Lamp sits close to the strip — at the panel level — and handles the signal output locally. This makes it well suited for multi-panel installations where centralizing all strip connections at a single controller would require long signal cable runs. The SPI Lamp receives its instructions from a master device (in this case a LEC3) and handles the strip driving independently.
What does the LEC3 controller do in a multi-panel setup?
The LEC3 acts as the central coordinator for the entire installation. It manages animation playback, timing, and synchronization across all connected output devices — in this case, the four SPI Lamps. From the user’s perspective, you work with the LEC3 as if it controls one unified wall: you load a sequence, configure the pixel layout, and the LEC3 distributes the correct data to each SPI Lamp automatically. The four-panel structure is invisible at the control level. This is the primary advantage of the architecture: physical segmentation for clean installation, logical unity for easy operation.
Can this type of pixel wall be adapted for other interior spaces?
Yes — the combination of vertical wooden profiles, aluminum LED channels, and independently controlled pixel panels is highly adaptable. The key constraints to design around are the 3 cm minimum depth for the profiles, power distribution to each panel (shorter runs are better), and the number of output devices needed relative to total pixel count. For residential spaces, a smaller number of panels with fewer pixels per strip works well. For larger commercial spaces — reception areas, restaurants, retail — scaling up with additional SPI Lamps keeps the installation manageable without requiring complex signal infrastructure. The design language of wood plus hidden LEDs also tends to read as interior design rather than technology, which makes it a natural fit for client-facing spaces.
Why combine wooden cladding with aluminum profiles rather than using profiles alone?
Aluminum profiles on their own produce a clean, modern result, but they read as a technical installation rather than a designed space. Adding wooden vertical cladding changes the visual context entirely — the wood introduces warmth, texture, and a sense of craftsmanship that makes the light effects feel deliberate rather than decorative. The combination also gives you more flexibility with the spacing and rhythm of the wall surface, since the wood pieces and the profile channels can be arranged independently. In a meeting room where the wall needs to function as a backdrop for calls, presentations, and conversations, a surface that looks designed rather than installed is worth the additional planning effort.